Shibori is the Japanese word for “twist or wring”.
This Japanese form of dyeing uses Indigo as the main form of dye. Methods include dyeing fabric by rolling, bending, tying, binding, folding, twisting and pressing. We immediately fell in love with this form of dyeing as its main color is Indigo Blue. This technique originated in Japan (where Breaking Matzo’s Andy Goldfarb has lived and traveled throughout the years). One of the tricks behind indigo dyeing is that once you have prepared the bath of dye in your vat, it no longer appears blue until, of course, it is exposed to oxygen. Magic! Remember whatever you use to resist the fabric will repel the dye – be it wood, rocks, and rubber bands. The materials used to resist can easily be found around your home. There are so many techniques from simple to abstract to create different patterns – we played around but look at our results!
And PLEASE post your results on Facebook or Instagram!
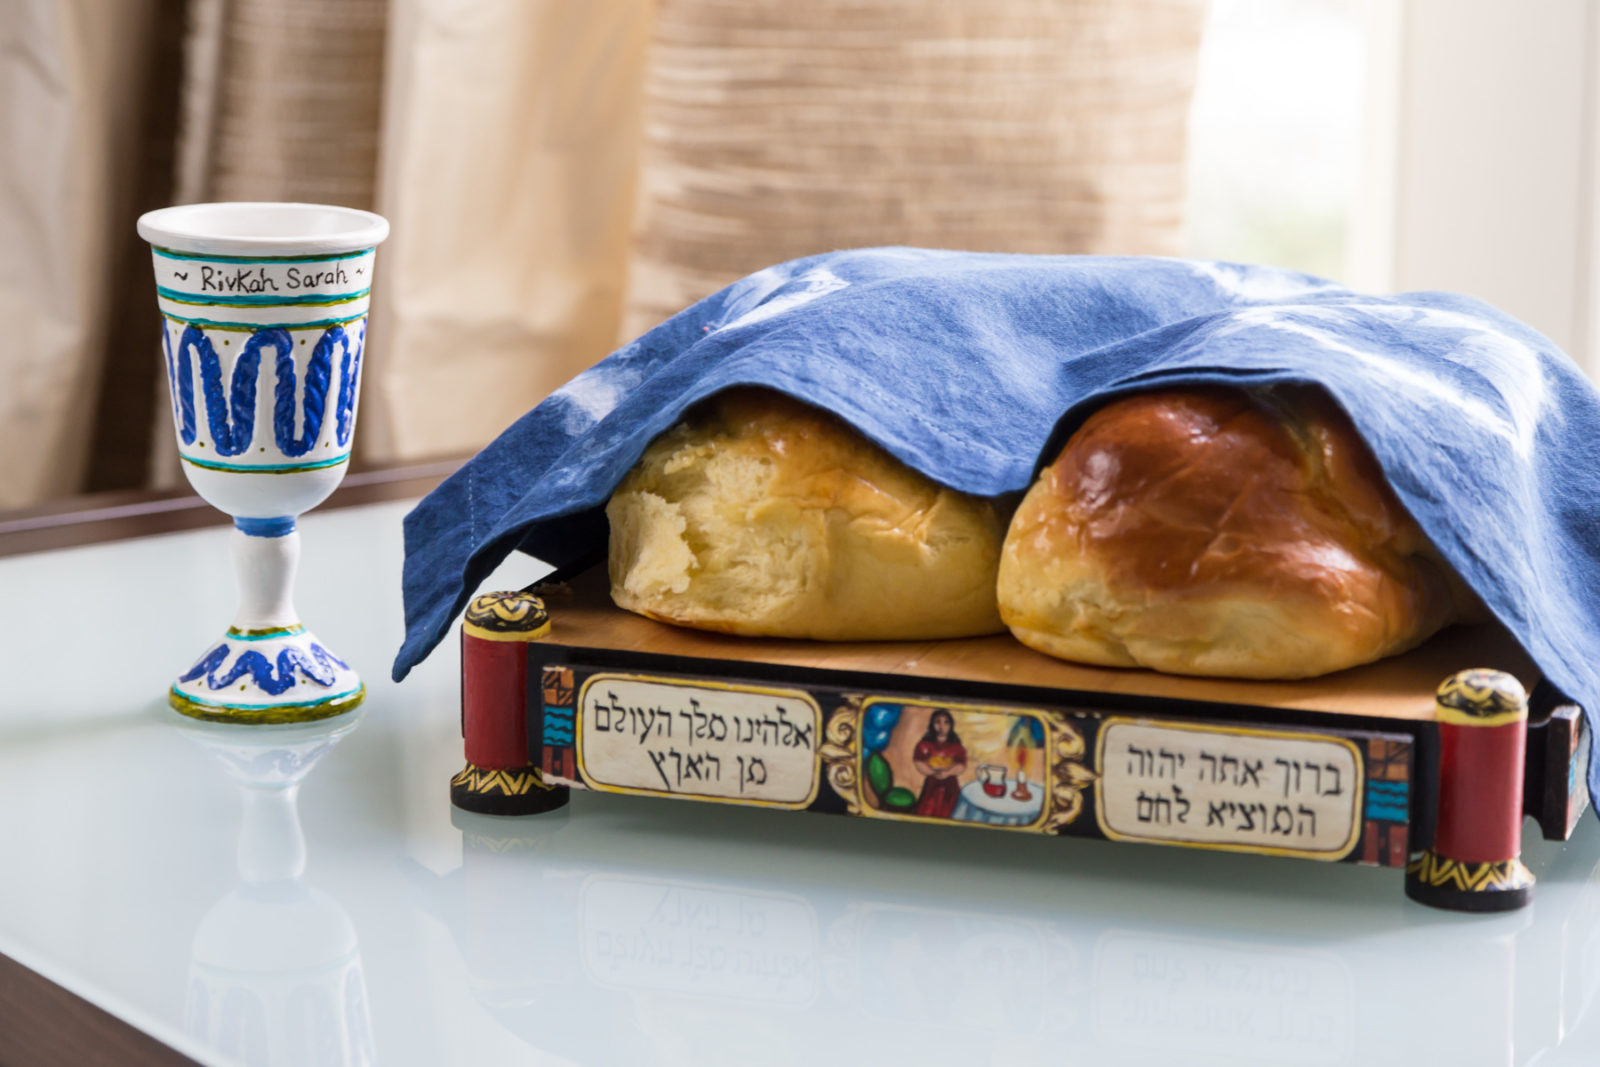
Make sure to use a large enough napkin to cover the traditional two challahs at your bar/bat mitzvah blessing table. This makes a gorgeous challah cover and you could even delight in creating a matching chair cover for the Horah!
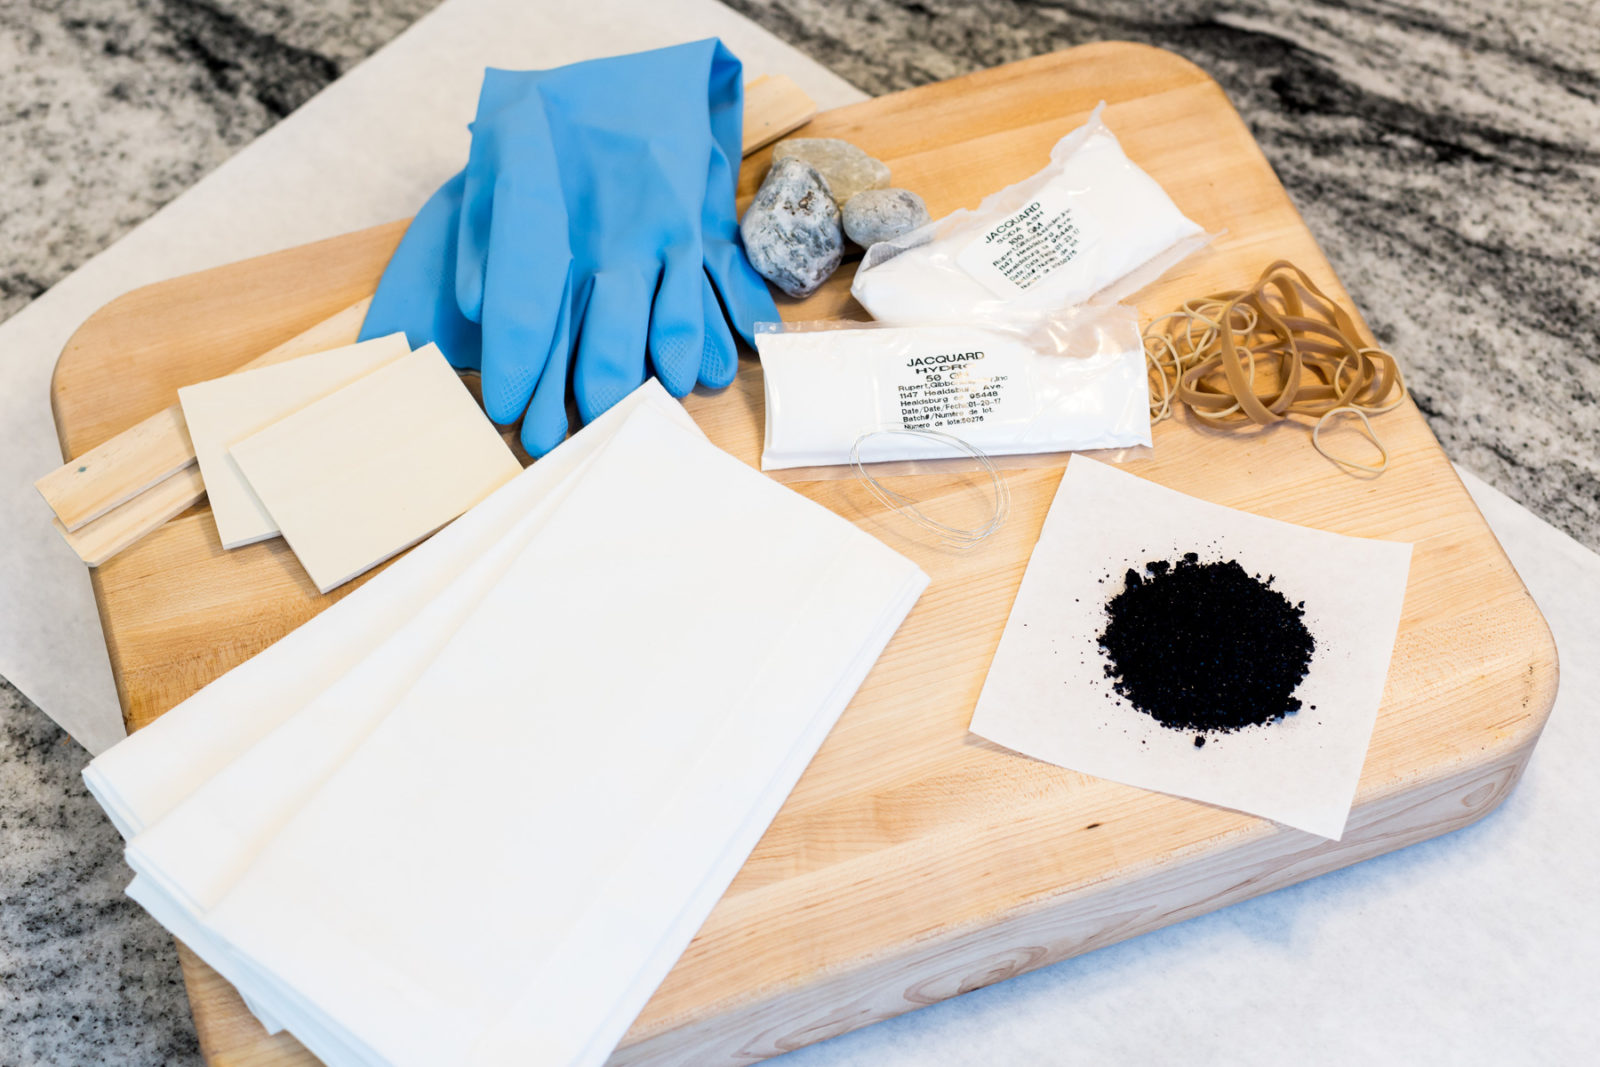
Materials:
- Indigo Tie Dye Kit
- Napkins (for cover)
- Rubber Gloves
- 5 Gallon Plastic Bucket With Lid
- Paint Stirrer or Yard Stick for Stirring
- Rocks or pebbles, rubber bands, wood boards, popsicle sticks
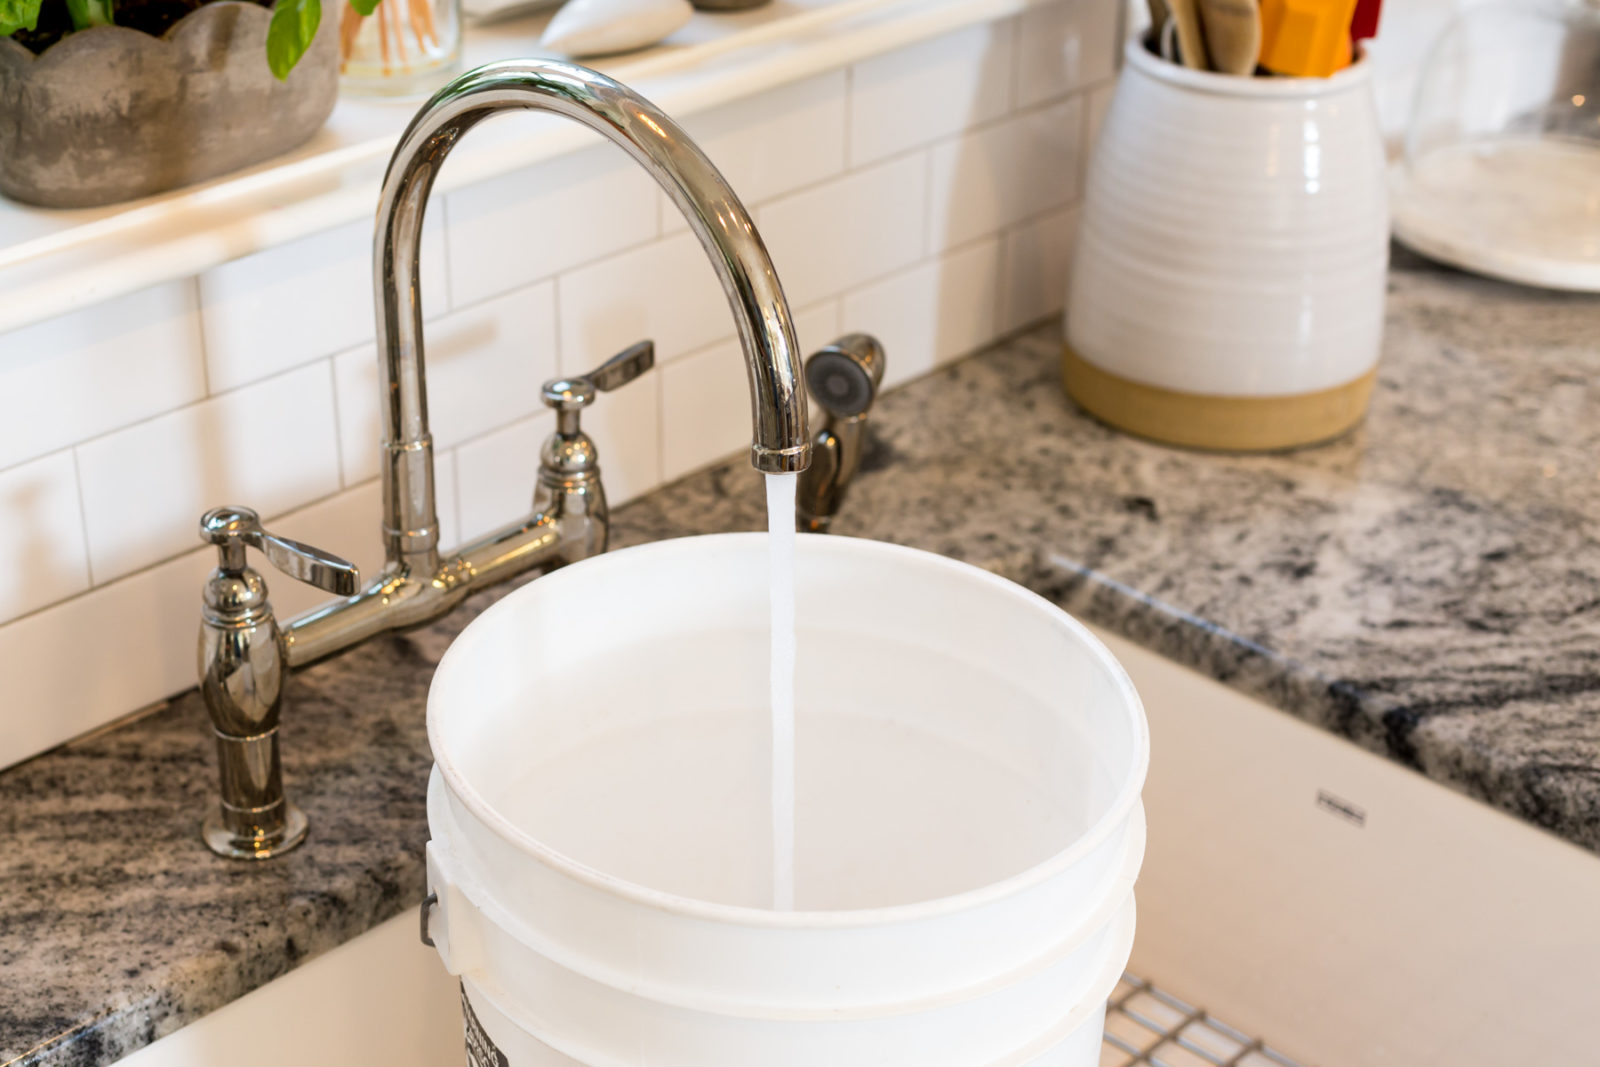
Step 1: pour 4 Gallons of warm water into bucket
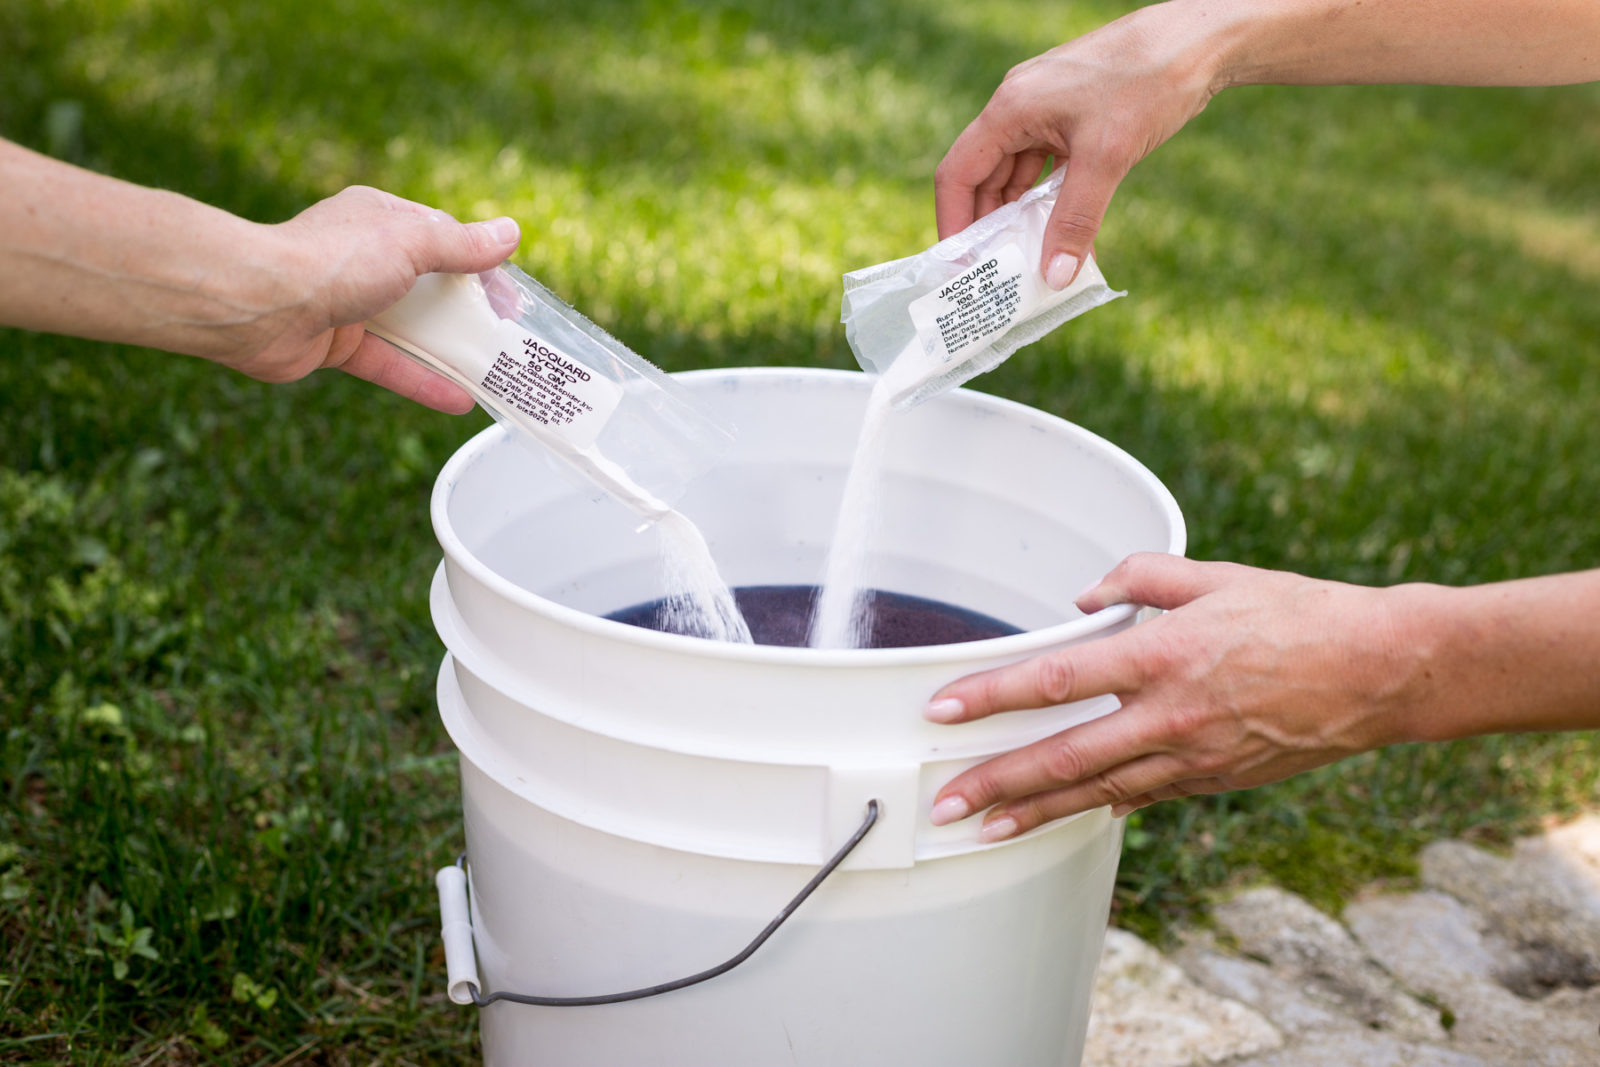
Step 2: Pour indigo powder into bucket. Stir in a circular motion
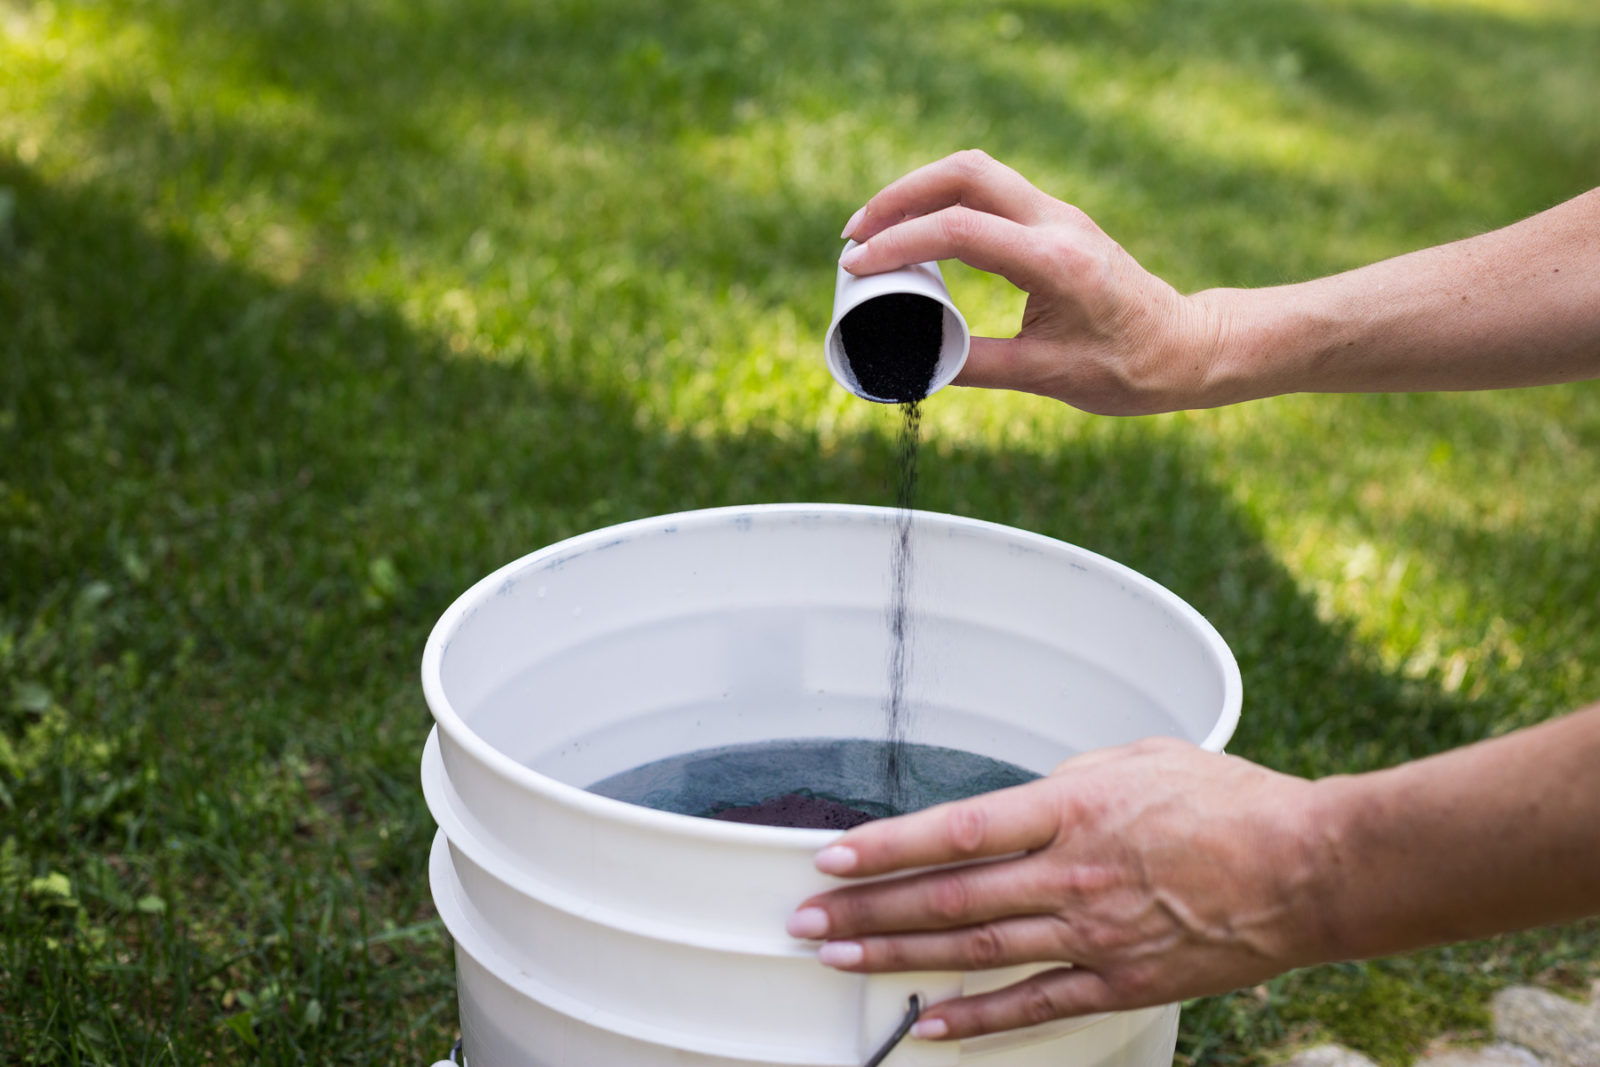
Step 3: Pour soda ash and Hydro into bucket while still stirring
Step 4: Stir all contents slowly reversing opposite direction dragging stick
along wall of bucket to incorporate. Put lid on bucket and let rest 1 hour.

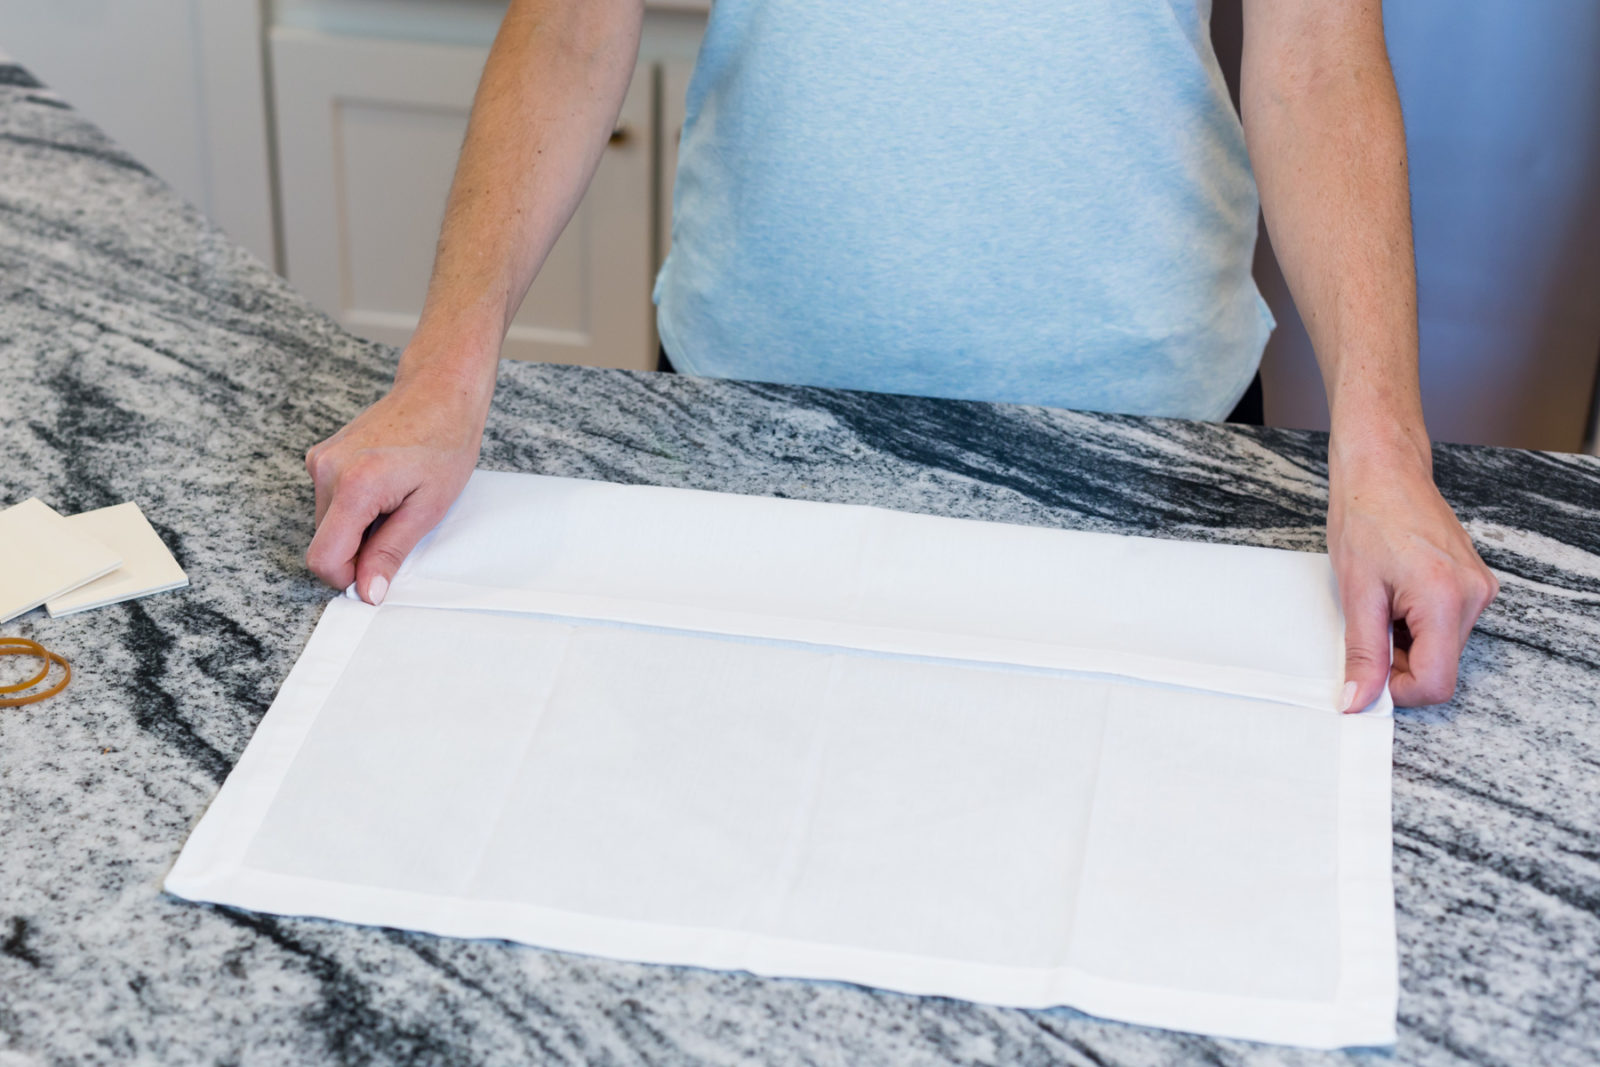
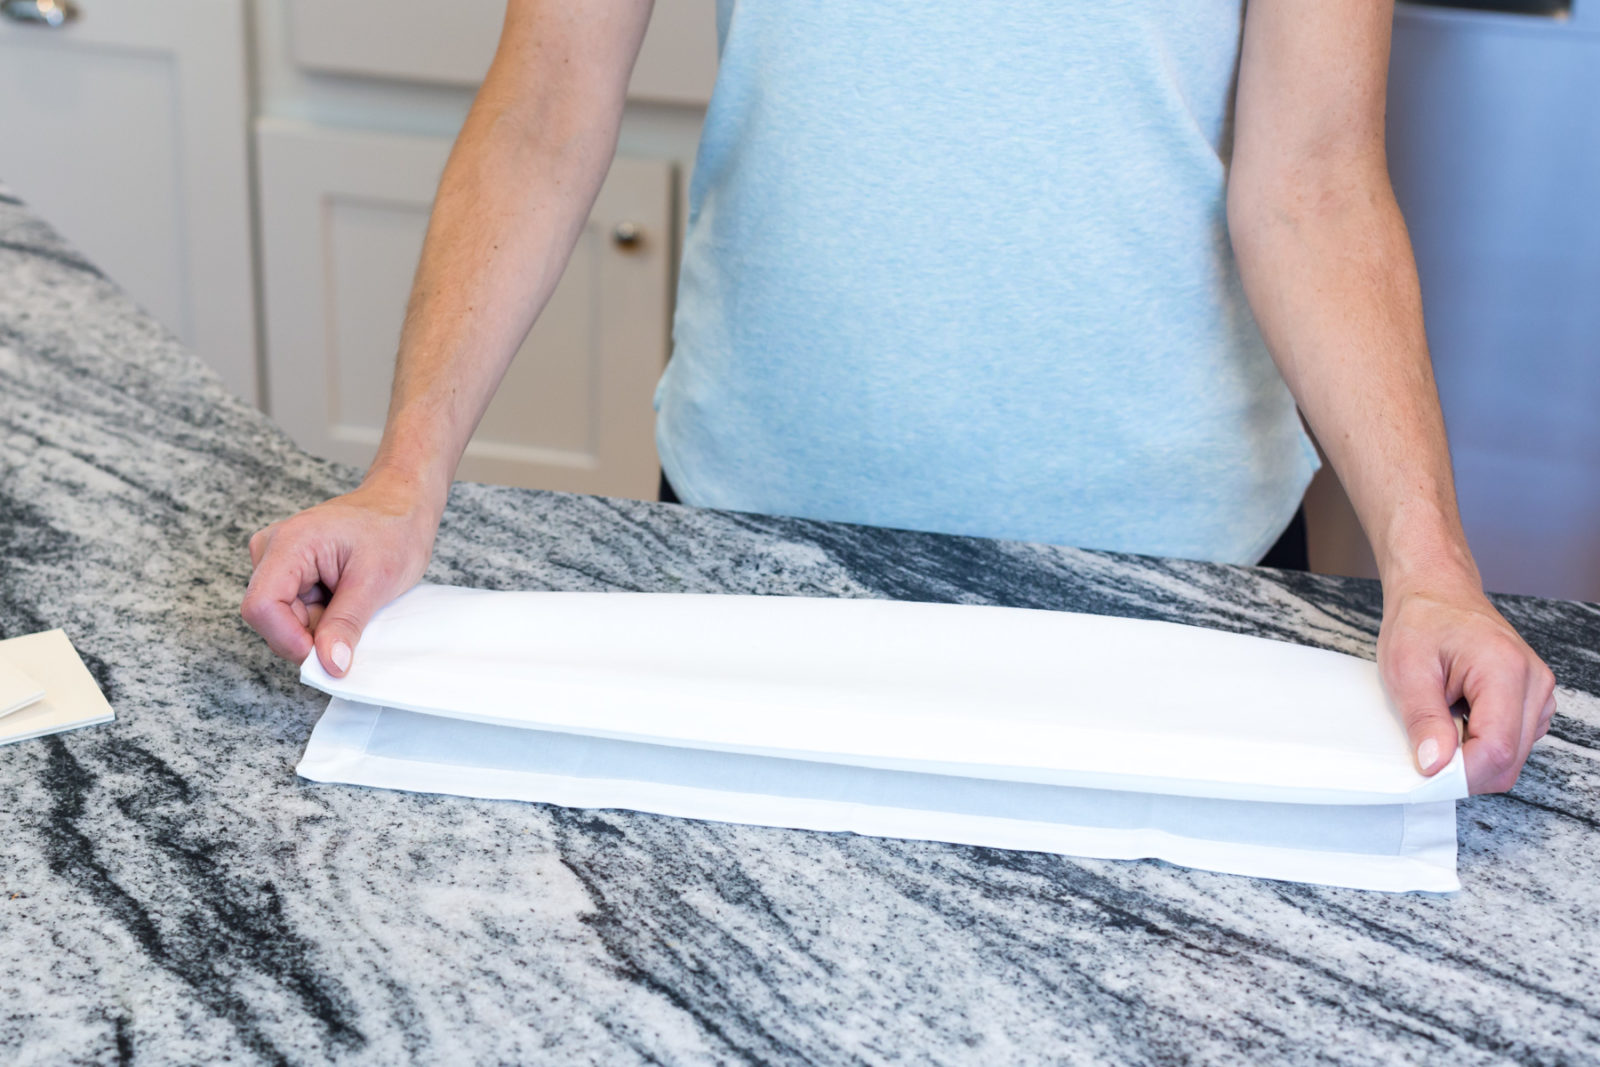
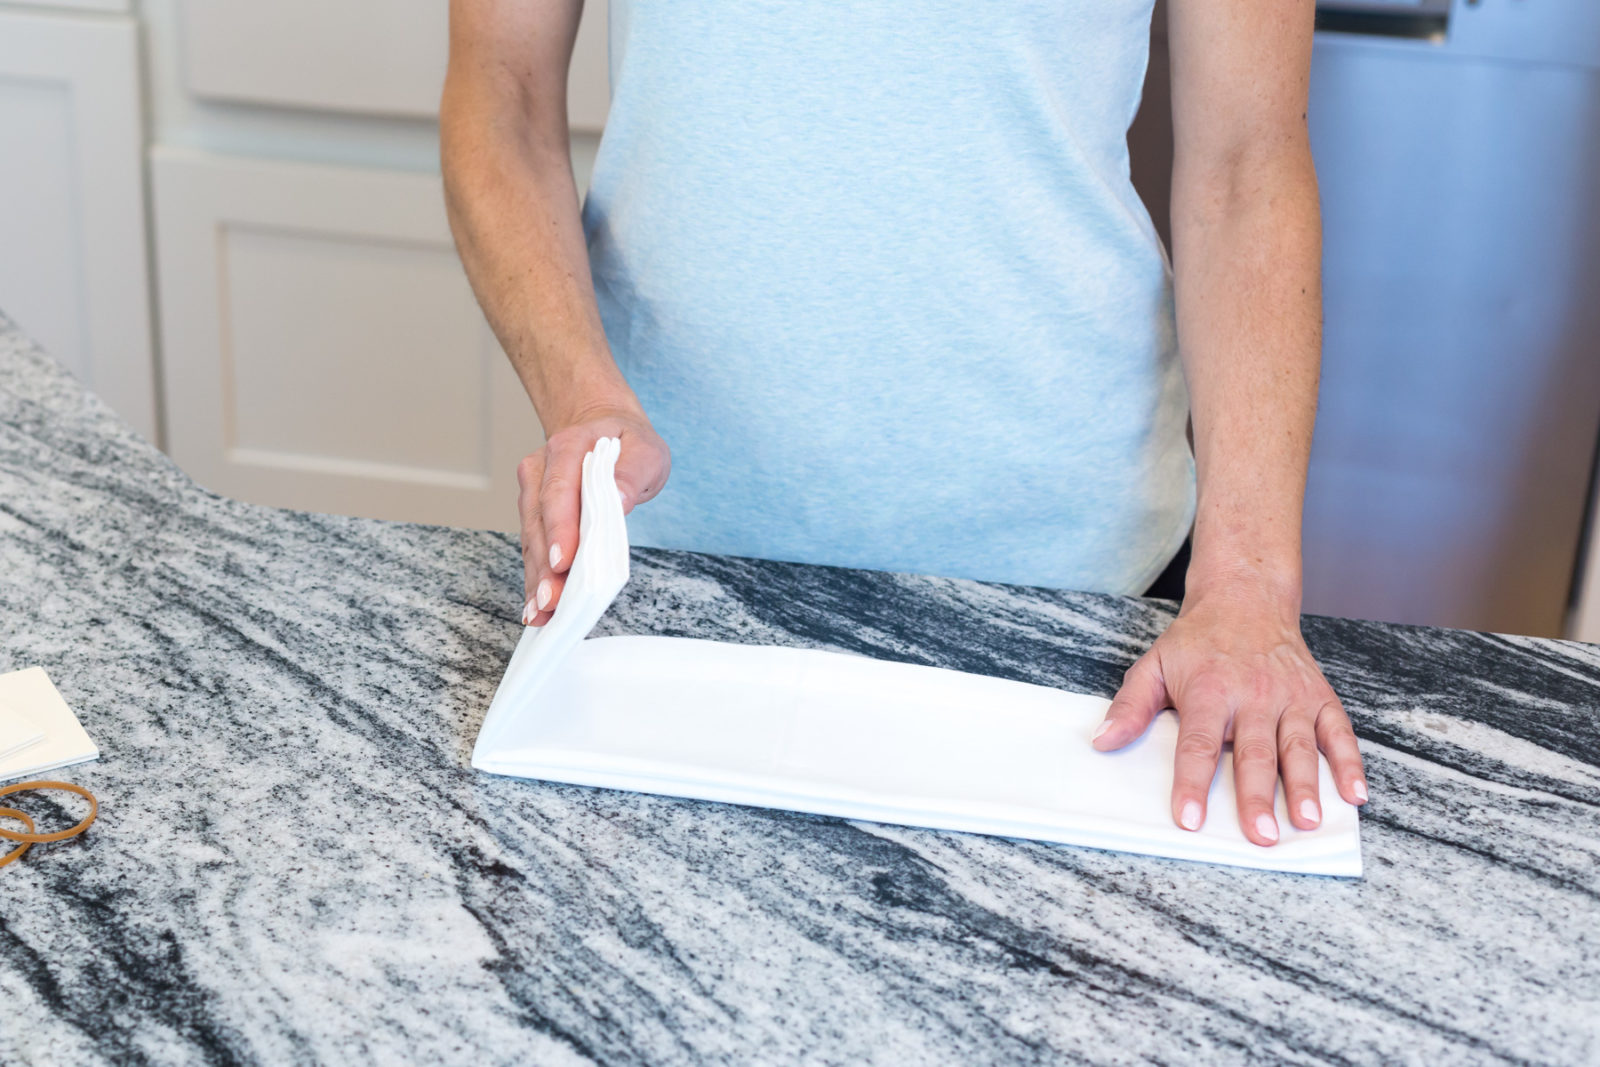
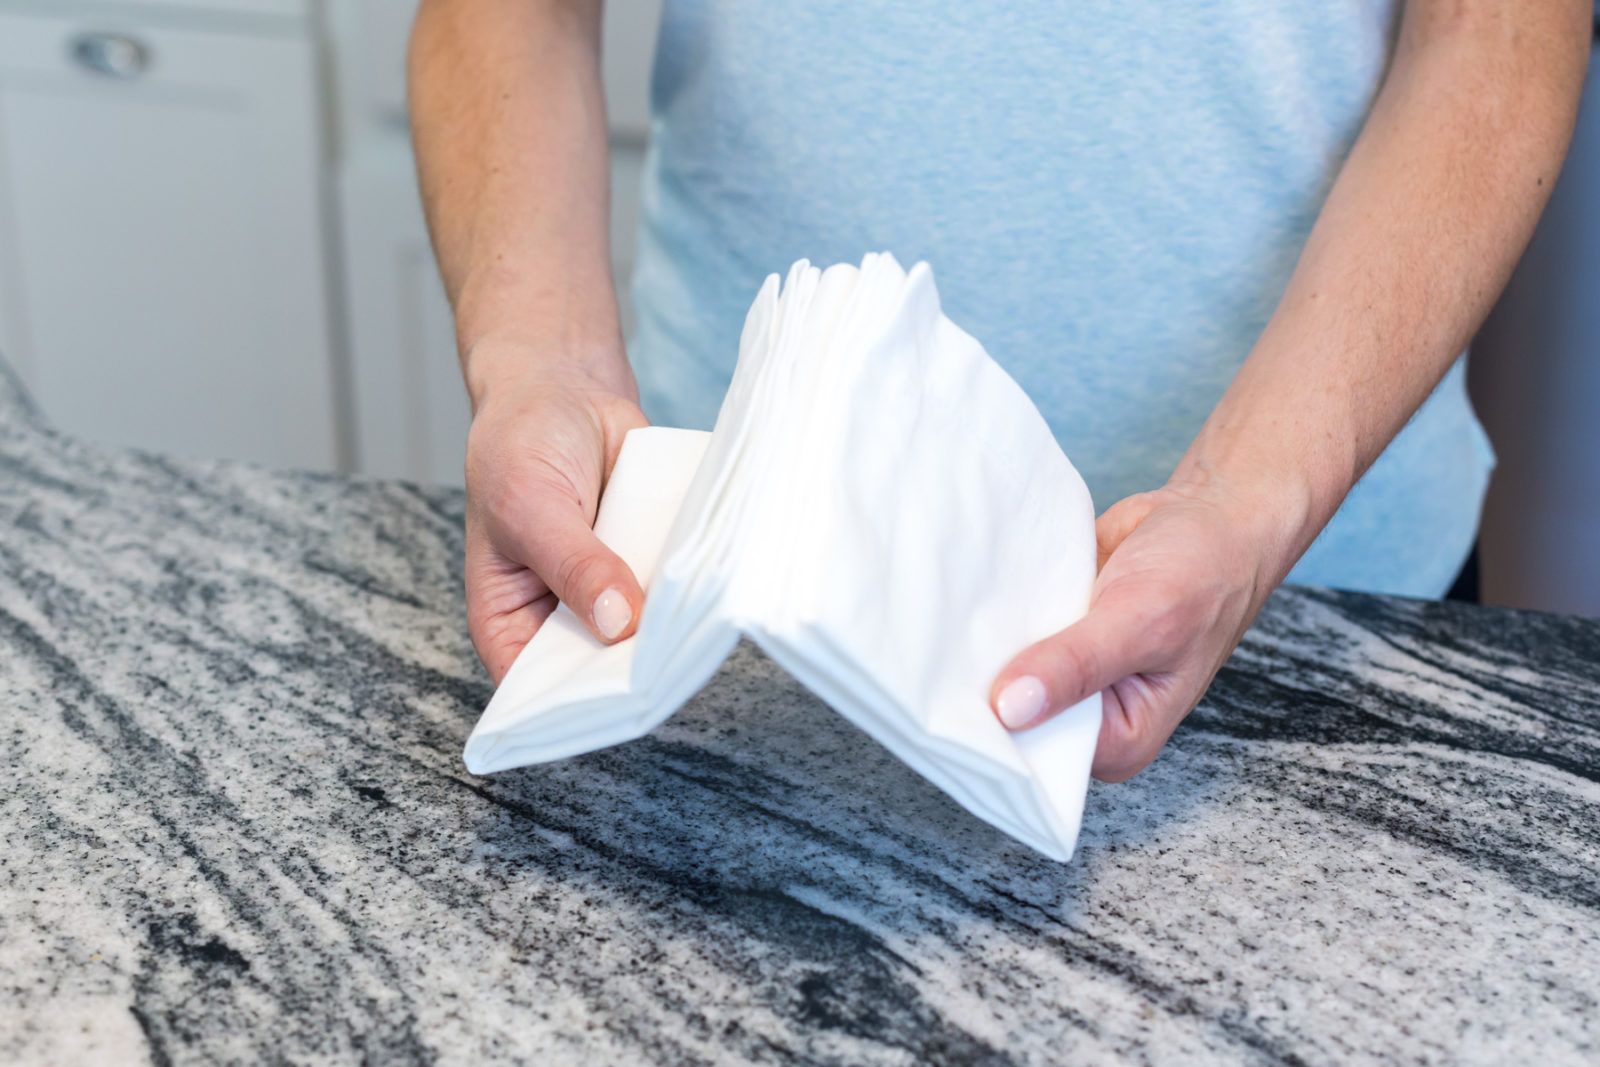
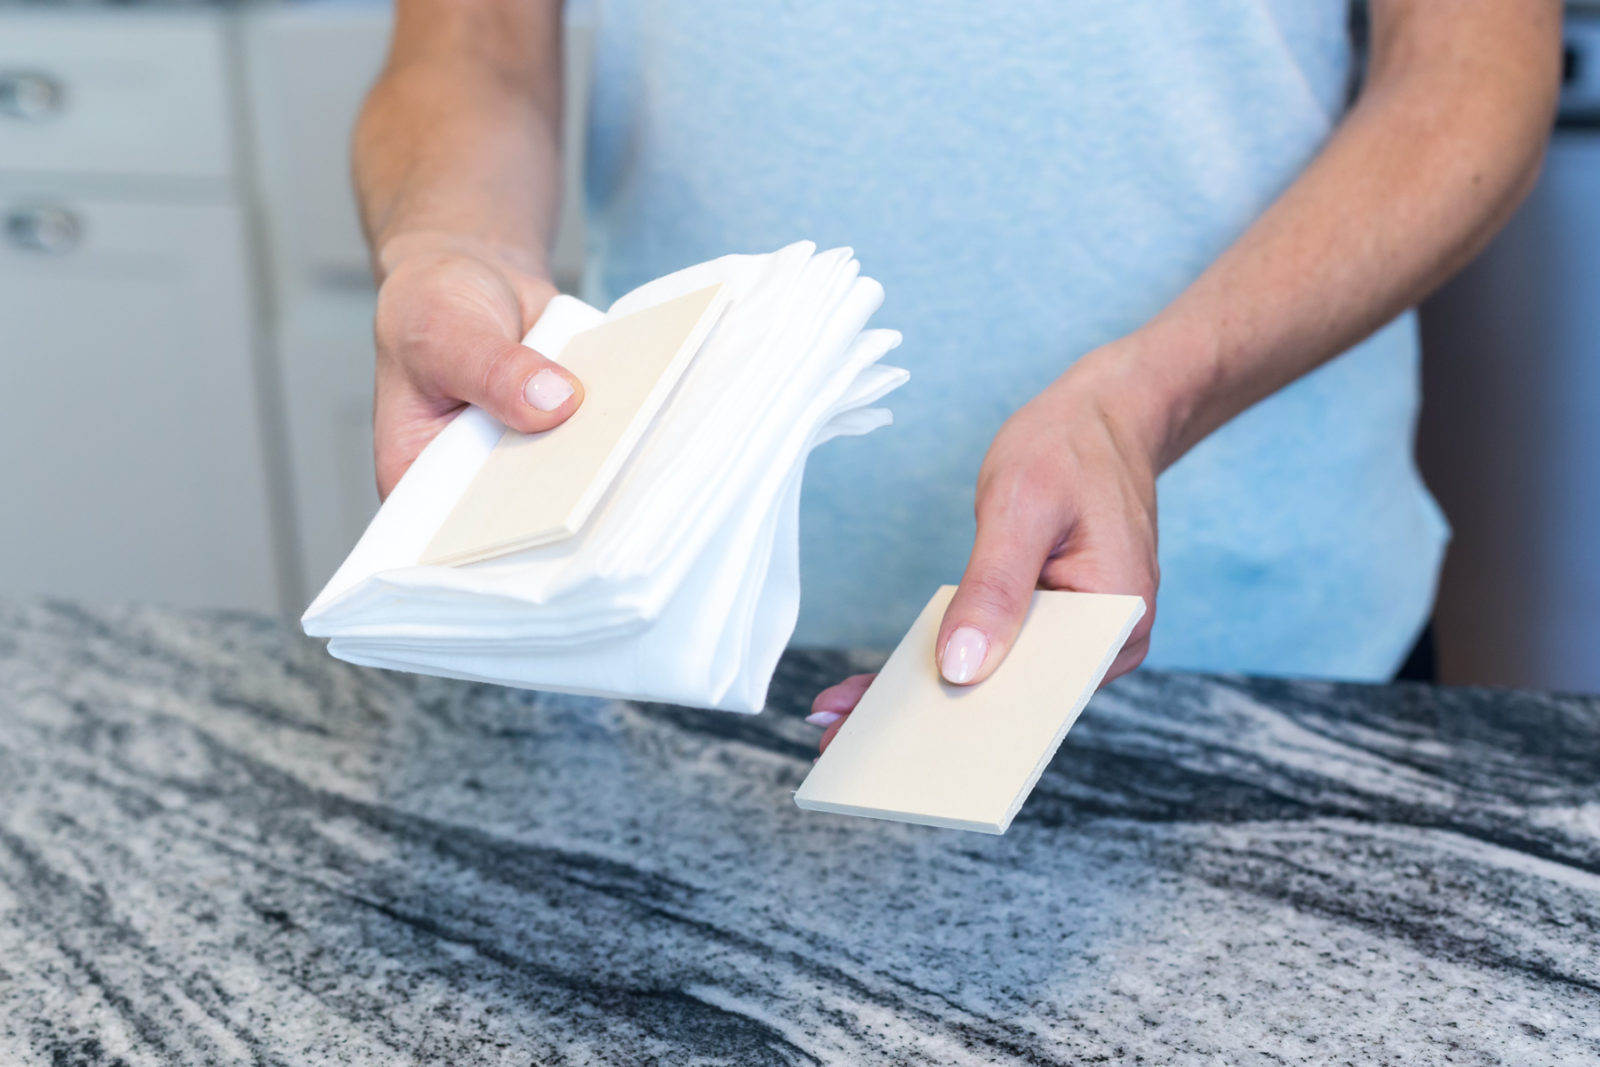
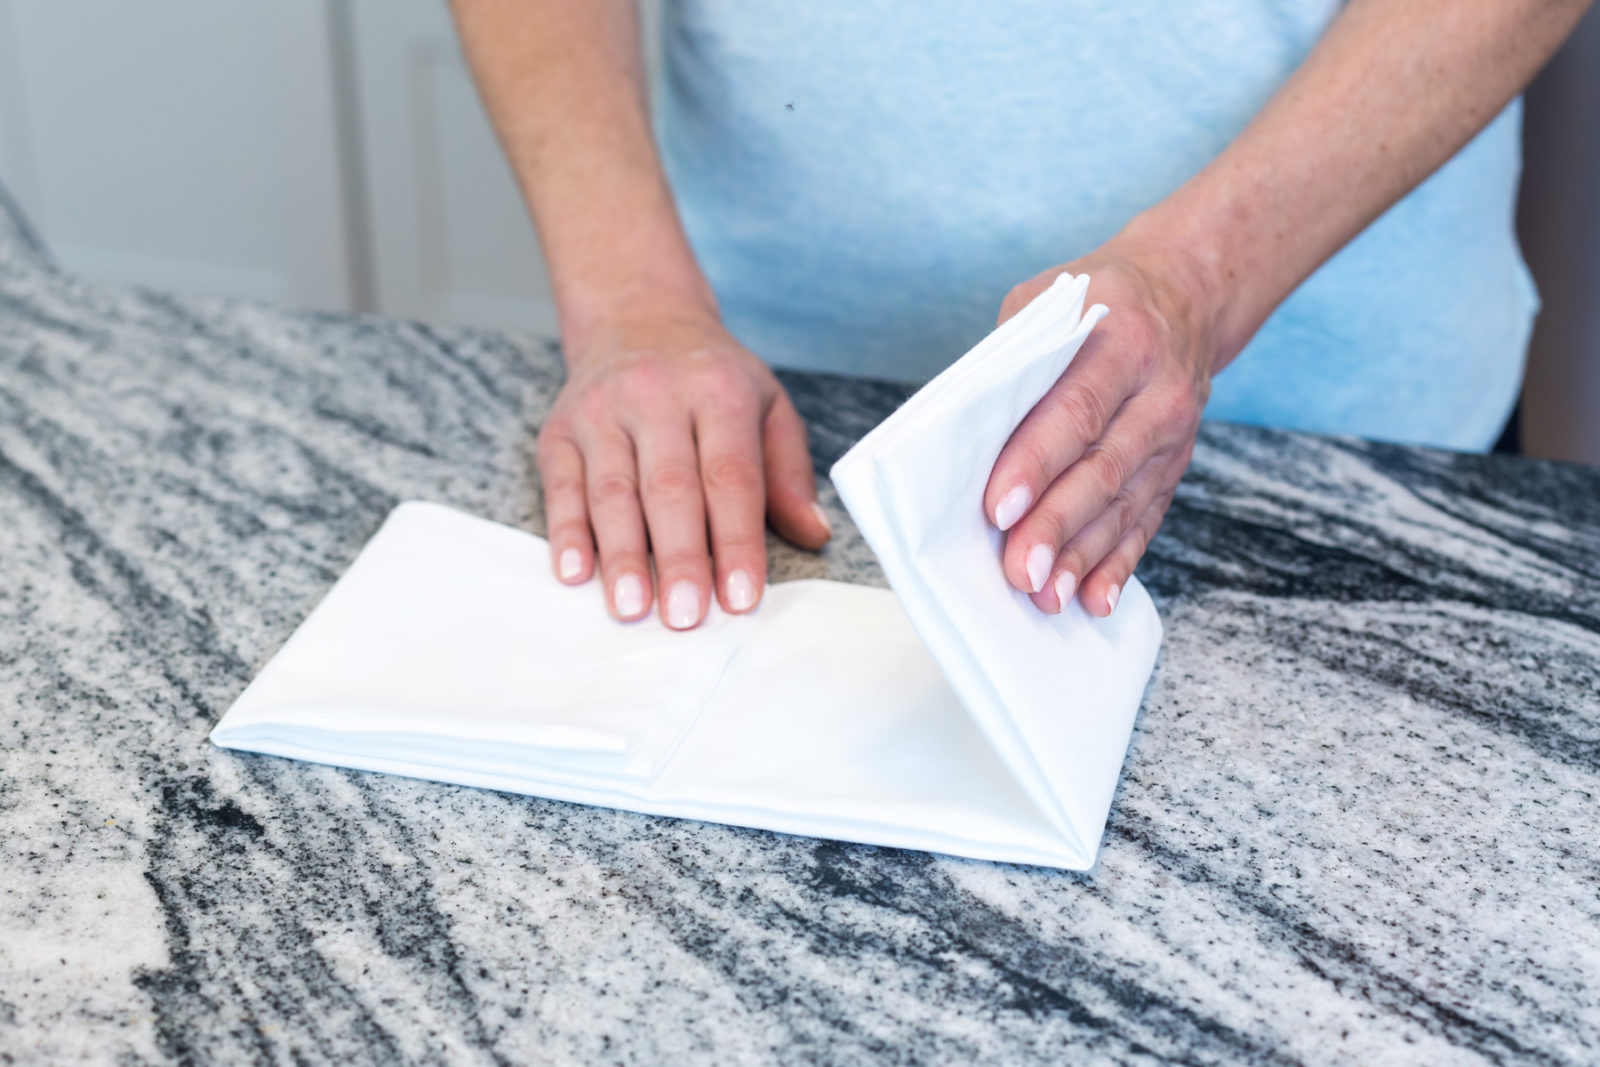
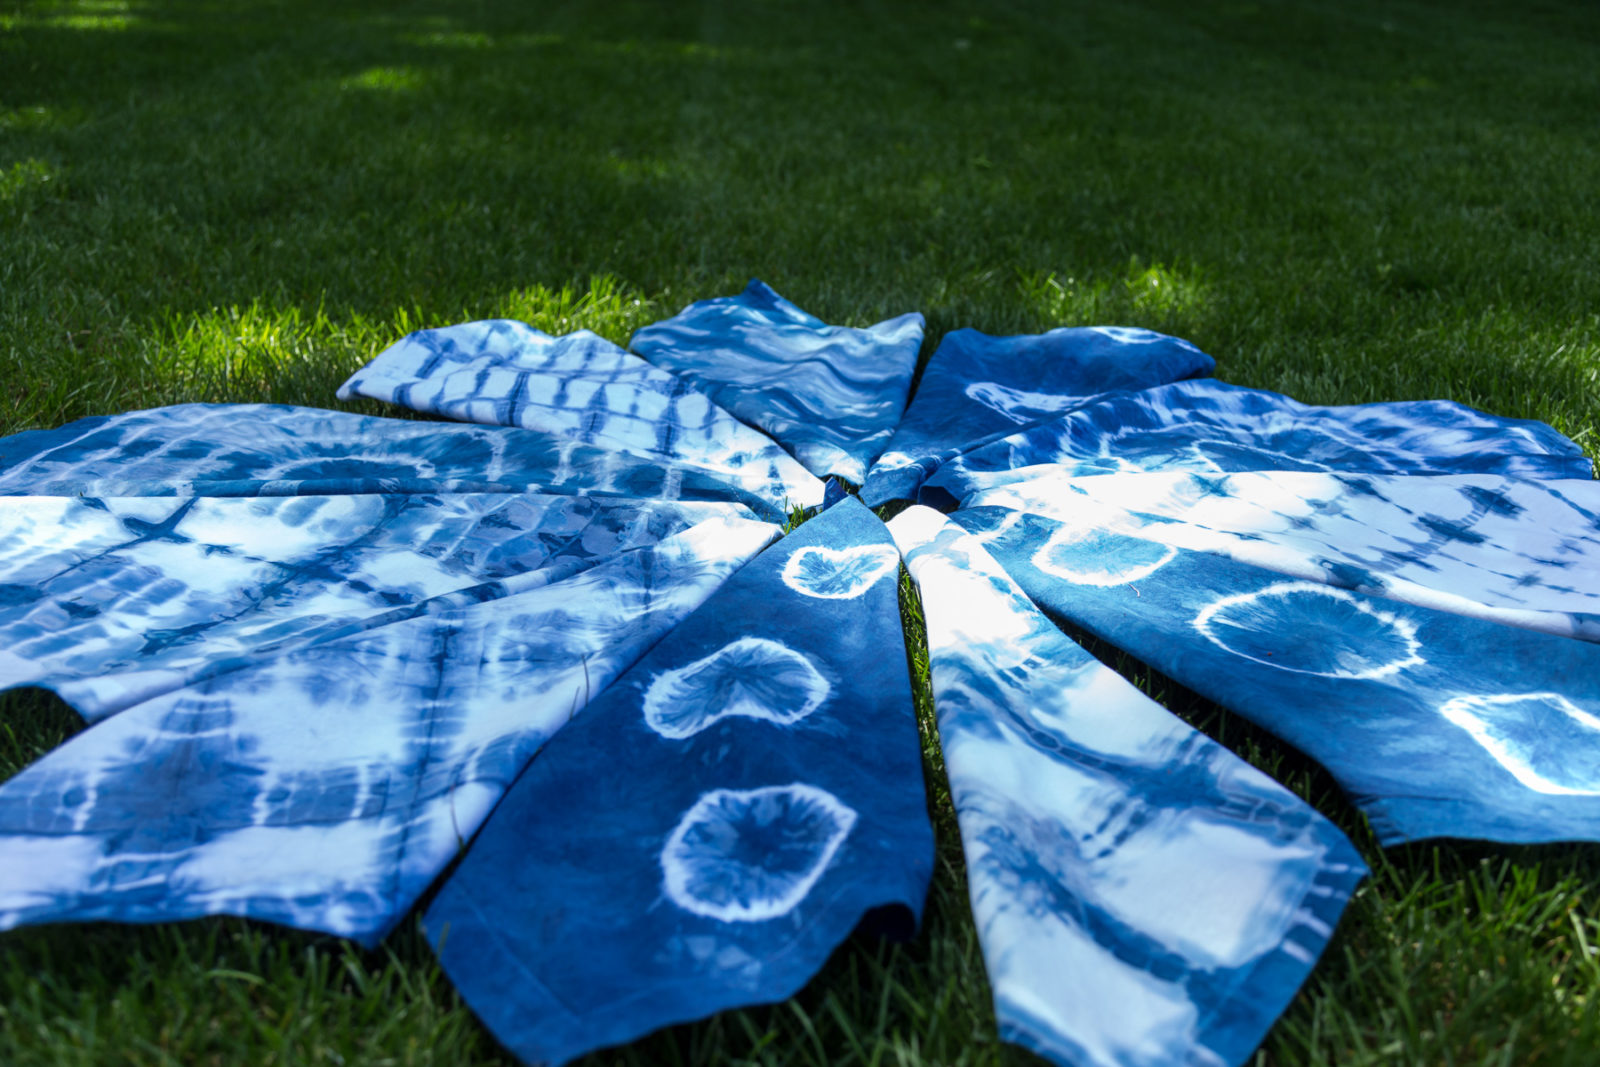
Step 5: While waiting for dye bath, start folding napkins! There are many techniques!!
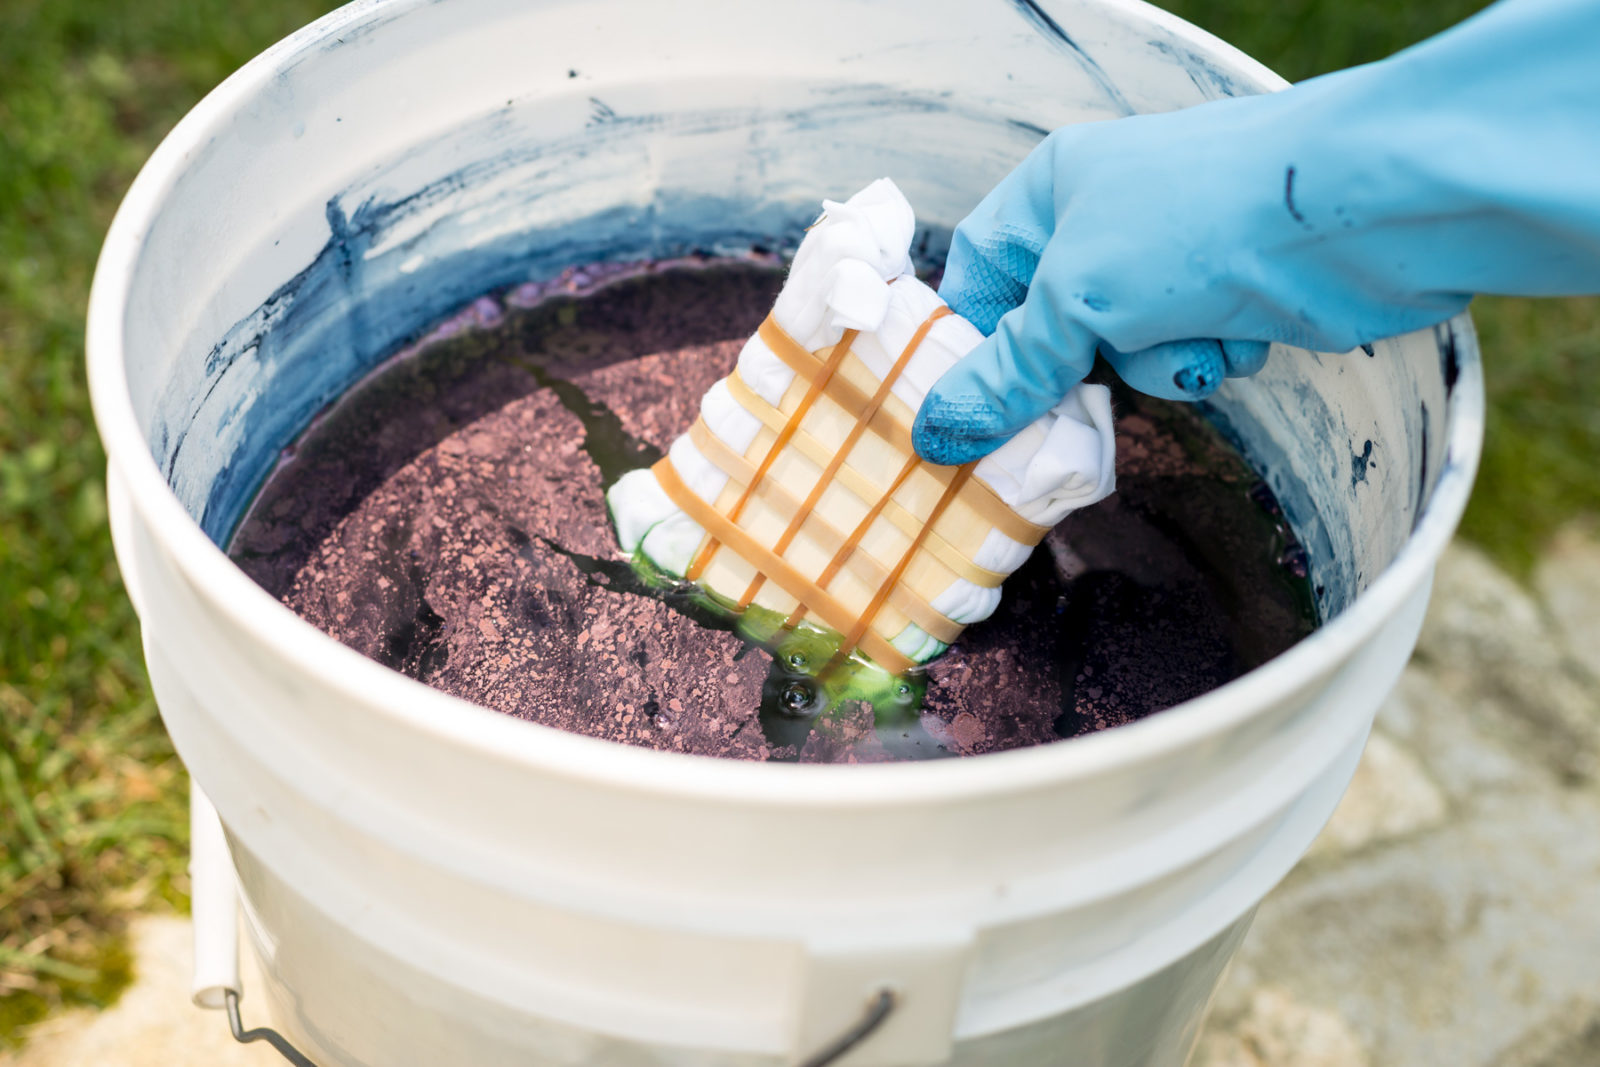
You can use wood boards, rubber bands, binder clips, and rocks and wrap napkins in
all different ways to find your favorite pattern. Here we used wood boards and rubber
bands (both come with the Indigo Dye Kit). Have fun and try a variety of methods….
no matter it will be your original shibori design!

Step 6: Check back with dye after 1 hour to make sure the dye “flowers” on top.
Move flower aside along the side of the bucket and make sure the dye is
yellowish green – dye will not appear blue until it is exposed to oxygen.
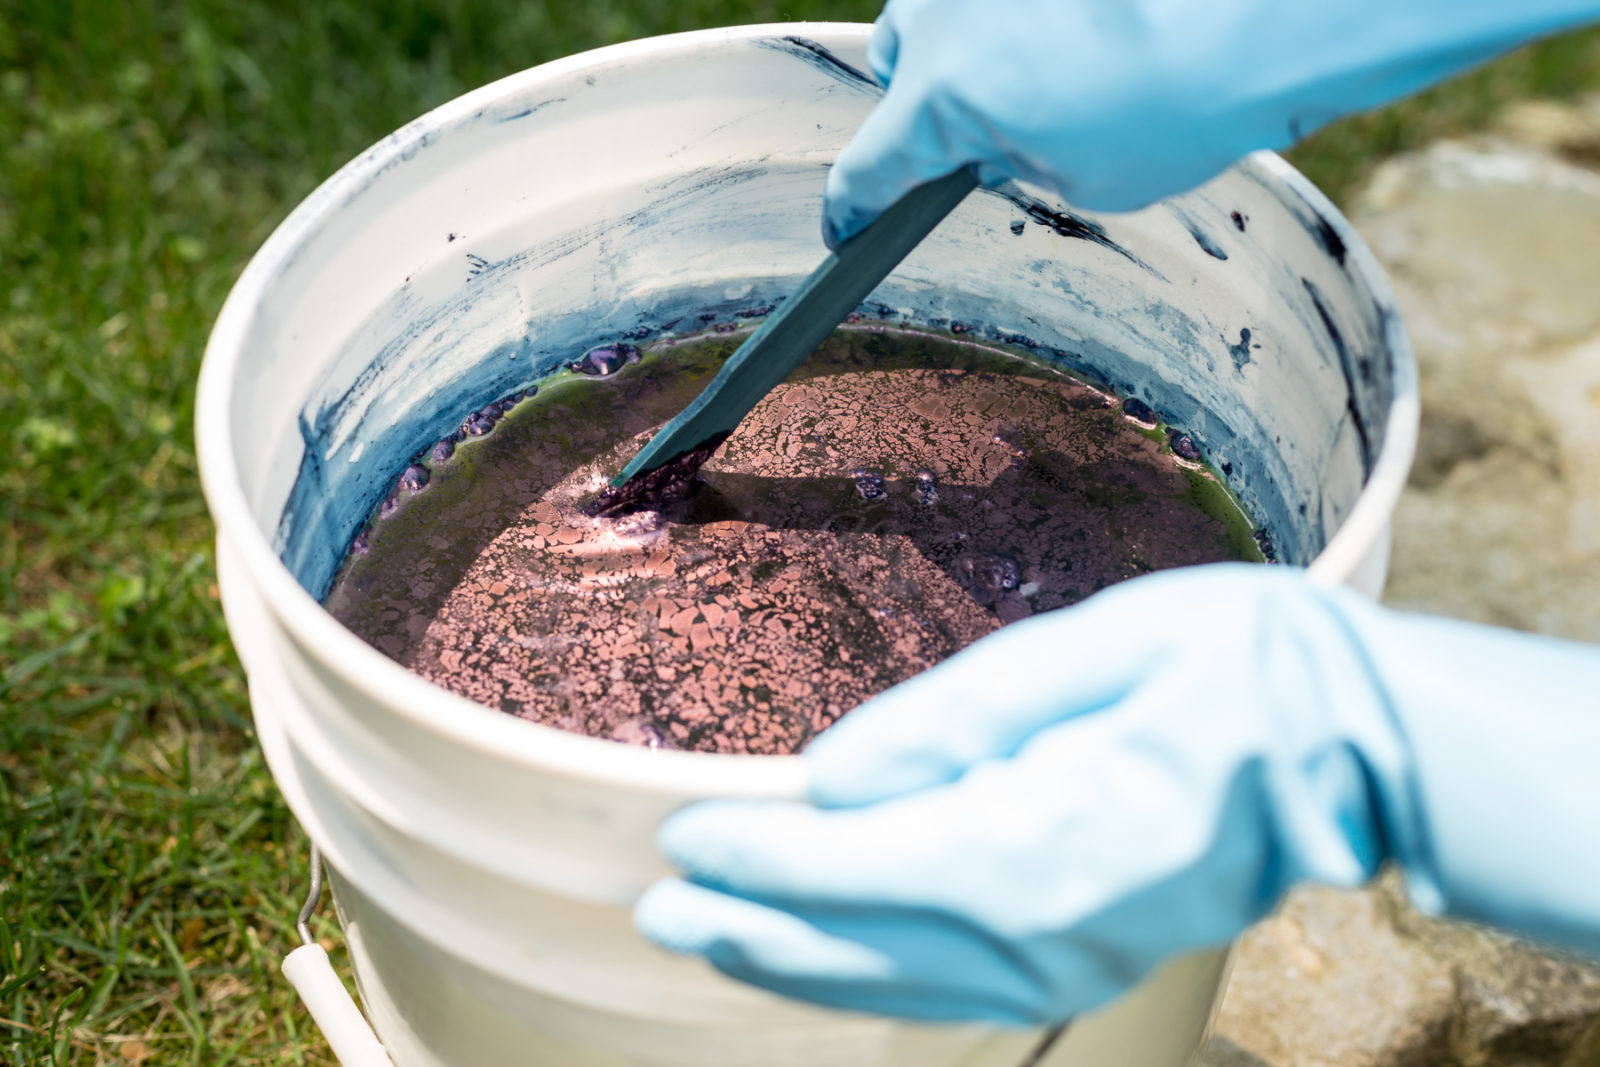
Step 7: Dip items into “bath” for 10 minutes. We used wire to help hold items
(you don’t want them to hit the bottom of the bucket as it will pick up settled residue.
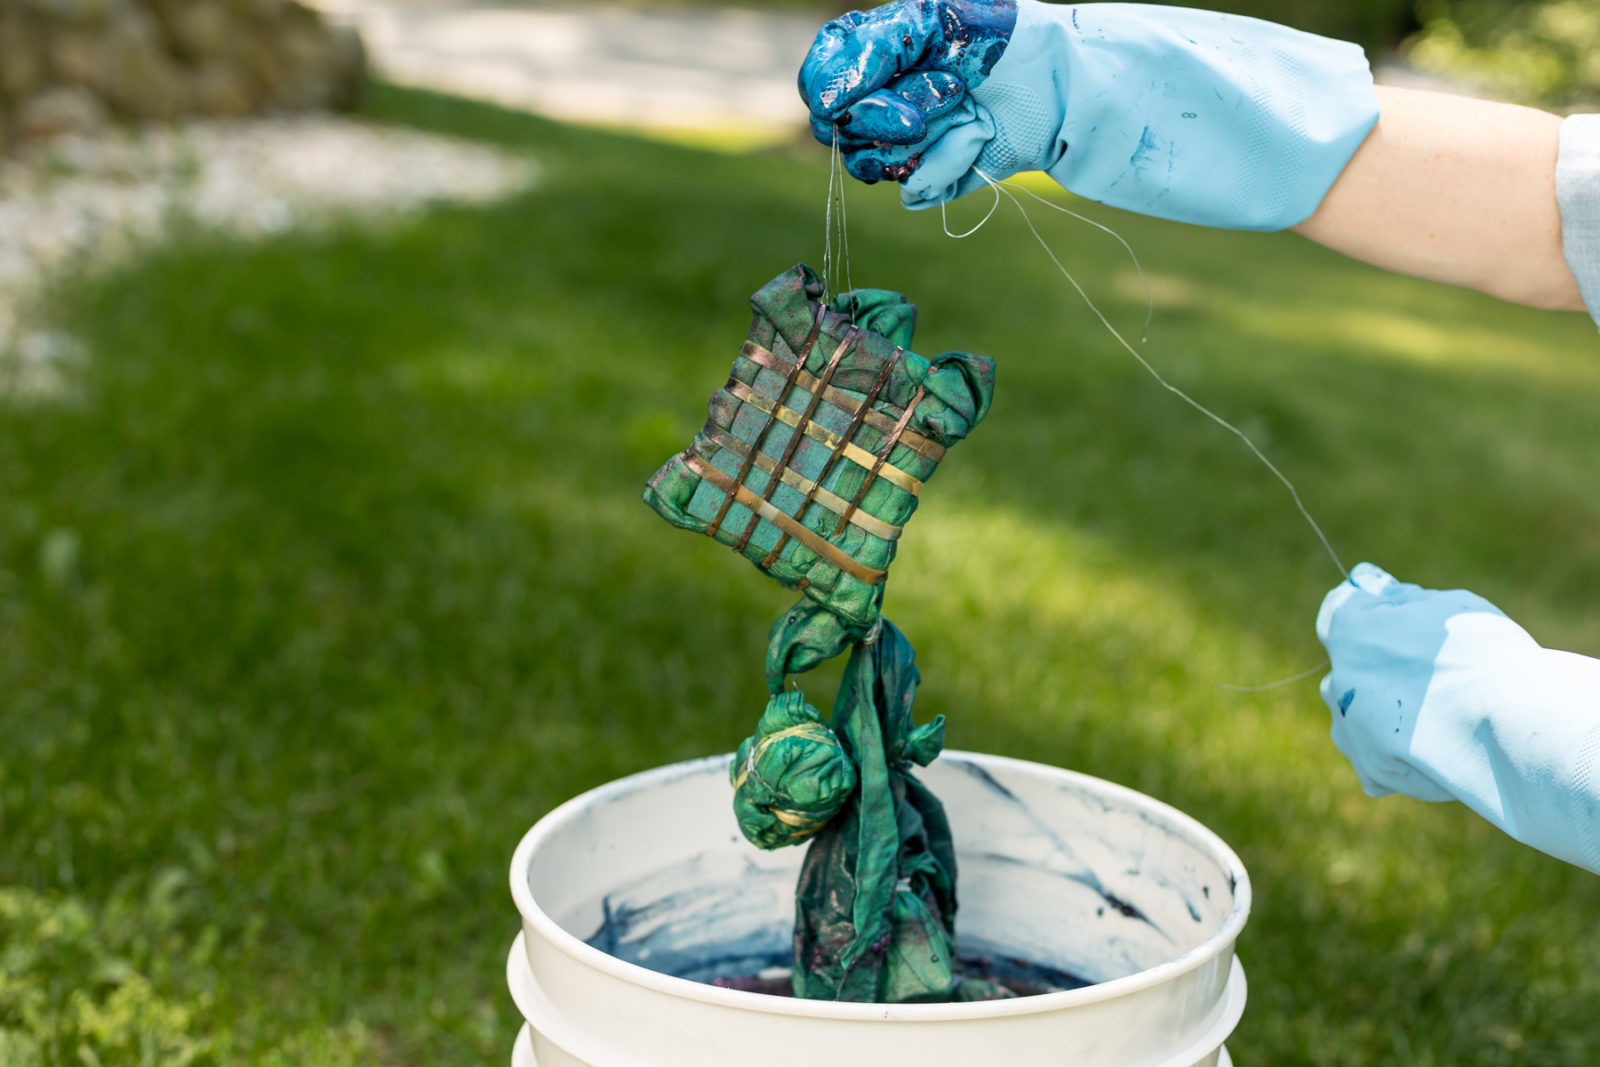
Step 8: Take Items out of bath (they will look green) and expose to air
until it turns blue. Put lid on vat while you wait for items to change color.
Step 9: Unwrap items you dyed and run under water until water runs clear.
Repeat Re-dip into dye another 5-10 minutes. Let rest 12-24 hrs.
Unwrap the rubber bands and boards and check out your design!! Make sure to wash out with water until it runs clear of dye.
Send in your ideas and designs…we would love to see YOUR unique creations!